
The ignition system is the heartbeat of any internal combustion engine, and a crucial component within it is the High Energy Ignition (HEI) coil. Responsible for transforming low-voltage battery power into the high-voltage spark needed to ignite the fuel-air mixture, the HEI coil plays a pivotal role in ensuring smooth engine operation.
However, like any other automotive part, it can experience wear and tear over time, potentially leading to ignition issues.
In this blog post, we will explore the importance of testing the HEI coil and provide a step-by-step guide on how to perform the test effectively.
Credit: www.chevyhardcore.com
How Do You Test a Hei Coil?
Testing the HEI Coil – Step by Step:
Follow these steps to effectively test the High Energy Ignition (HEI) coil:
1. Safety First: Before starting any testing procedure, ensure the engine is turned off, and disconnect the battery to prevent electrical shock or accidents.
2. Locate the HEI Coil: Identify the HEI coil in your vehicle. It is often located near the distributor.
3. Inspect for Physical Damage: Visually inspect the HEI coil for any signs of physical damage, such as cracks or burns. Replace the coil if any damage is found.
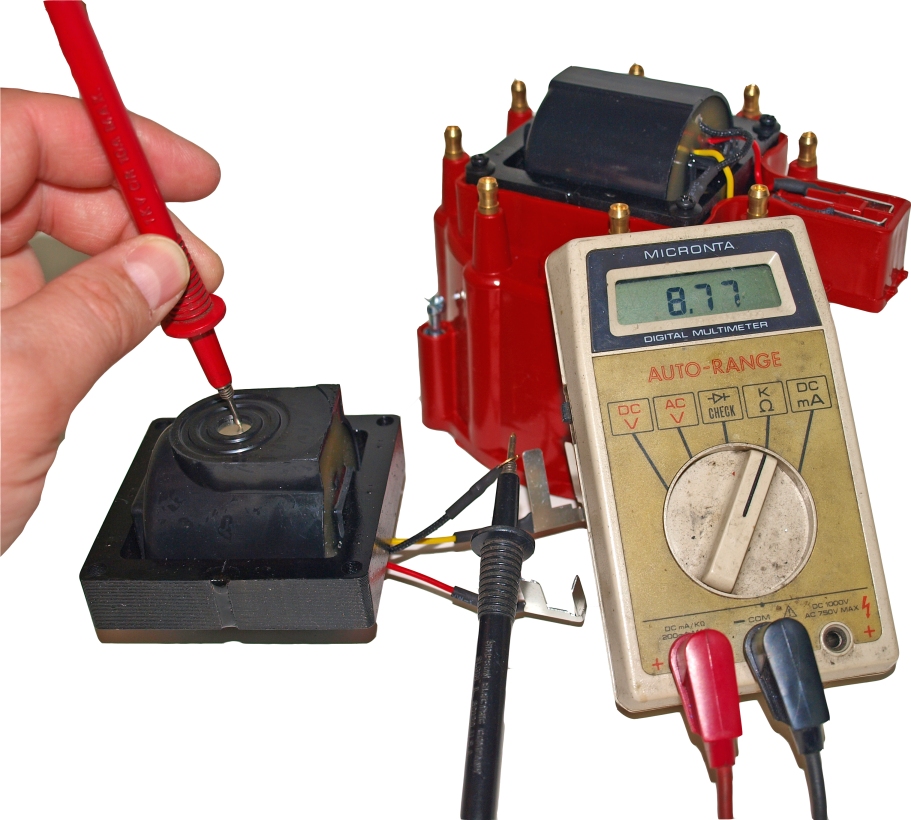
4. Measure Resistance: Use a multimeter to measure the resistance of the HEI coil. Consult your vehicle’s service manual for the specific resistance values. Deviations from these values may indicate a problem.
5. Test Primary and Secondary Circuits: Check both the primary and secondary circuits of the HEI coil. The primary circuit consists of the power and ground connections, while the secondary circuit includes the high-tension lead to the distributor cap. Ensure proper continuity in both circuits.
6. Perform Spark Test: With the help of a spark tester, check for a strong and consistent spark when cranking the engine. Inconsistent or weak sparks may point to a faulty HEI coil.
7. Consult the Service Manual: Always refer to your vehicle’s service manual for specific testing procedures and specifications. Different vehicles may have unique requirements.
How Do You Test a Gm Hei Distributor Coil?
Testing a GM HEI distributor coil is an important step to make sure your vehicle runs properly and efficiently. Before testing, you’ll need to remove the distributor from the engine so you can access the wiring connections for the coil. Once removed, you will be able to use an ohmmeter or multimeter to test the resistance of both primary and secondary windings in your GM HEI coil.
To do this, start by disconnecting all wires from your distributor cap. Then connect one lead of your meter’s probes directly into each terminal on the coil itself. You should see a reading that corresponds with what is stated in service manuals (typically between 4-9 ohms).
If there is no reading or it reads higher than expected then it means there may be something wrong with either winding of your ignition coil and should be replaced as soon as possible before further damage occurs.
How Do You Test a Gm Ignition Coil With a Multimeter?
Testing a GM ignition coil with a multimeter is an essential step when diagnosing problems with the vehicle’s engine. Testing the coil will help to determine whether it is functioning properly or not and whether it needs replacement.
To begin testing, set your multimeter to resistance mode and then disconnect the negative battery cable from the battery post.
When doing this be sure to use insulated pliers as you do not want any shocks. Next, remove all of the spark plug wires connected to both sides of the ignition coil and ground them against each other by twisting them together gently.
Once that is done, attach one lead from your multimeter on either side of the primary terminal on top of your Ignition Coil Pack; typically these are two large terminals located in close proximity at one end of the pack’s housing.
Then attach another lead from your multimeter onto either side of secondary terminal (smaller terminal). If everything is working correctly, you should get a reading between 0-5 ohms; if there isn’t any reading displayed then you may have a faulty ignition coil which needs replacing immediately before driving again for safety reasons!
How Do I Know If My Hei Ignition Module is Bad?
In order to determine whether or not your HEI ignition module is bad, there are several tests that can be done. The first thing to do is to check the connections and wiring of the module itself. Make sure all connectors are properly connected and wired correctly.
If everything looks good, then it is time to test the actual operation of the module itself. You can do this by connecting a voltmeter to both terminals on the module and measuring for continuity or resistance using an ohmmeter. If you observe no continuity between terminal A and B when testing with an ohmmeter, then it could indicate that your HEI ignition module has failed and needs replacing.
Additionally, if you suspect that your engine performance has been affected by a faulty ignition system, you may want to consider replacing or repairing your HEI Ignition Module as soon as possible in order to restore optimal performance from your vehicle’s engine.
Conclusion
Testing a hei coil is an important part of troubleshooting any vehicle with an ignition system. By following the steps outlined in this blog post, you can easily identify if the hei coil needs to be replaced or not. Furthermore, by understanding how and why the test works, you can ensure that other parts of your vehicle’s ignition system are working properly as well.
Taking these steps will help keep your car running smoothly for many years to come.